To add members to your team, go to Staff > click Add new staff > Open Add new staff page.
1. Staff Information
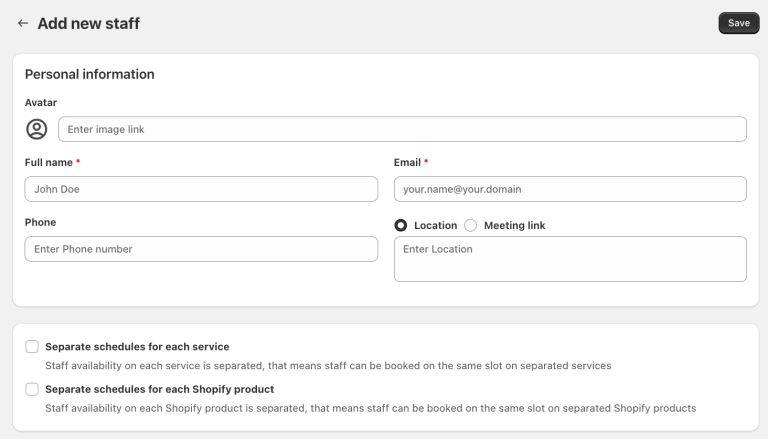
Under Personal information, enter the staff member’s details.
Avatar: Enter an image link in the Avatar field to add a profile image for the staff member.
Full Name: Enter the staff member’s full name. This field is required.
Email: Enter the staff member’s email address. This field is required and can be used to identify the staff member for booking-related communication.
Phone: Enter the staff member’s phone number.
Location – Select this option and enter the physical meeting location.
Meeting link – Select this option and enter the online meeting link.
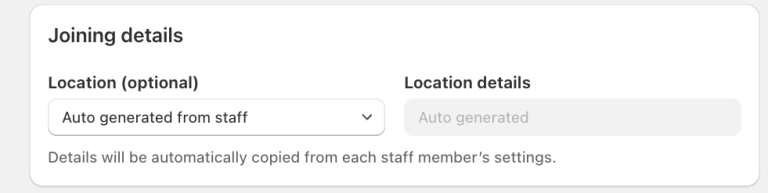
This allows you to provide the appropriate joining information for appointments assigned to the staff member. This will be shown on Joining details of the service which is assigned to this staff.
2. Configure Separate Schedules
The staff profile provides two options for separating staff availability.
Separate schedules for each service: Enable if you want the staff member’s availability to be managed independently for each service.
When enabled, the staff member can be booked in the same time slot for different services, because availability is separated by service.
Example:A staff member can have a booking for Service A at 10:00 AM and another booking for Service B at 10:00 AM.
Separate schedules for each Shopify product: Enable if you want the staff member’s availability to be managed independently for each Shopify product.
When enabled, the staff member can be booked in the same time slot for different Shopify products because availability is separated by product.
3. Team portal
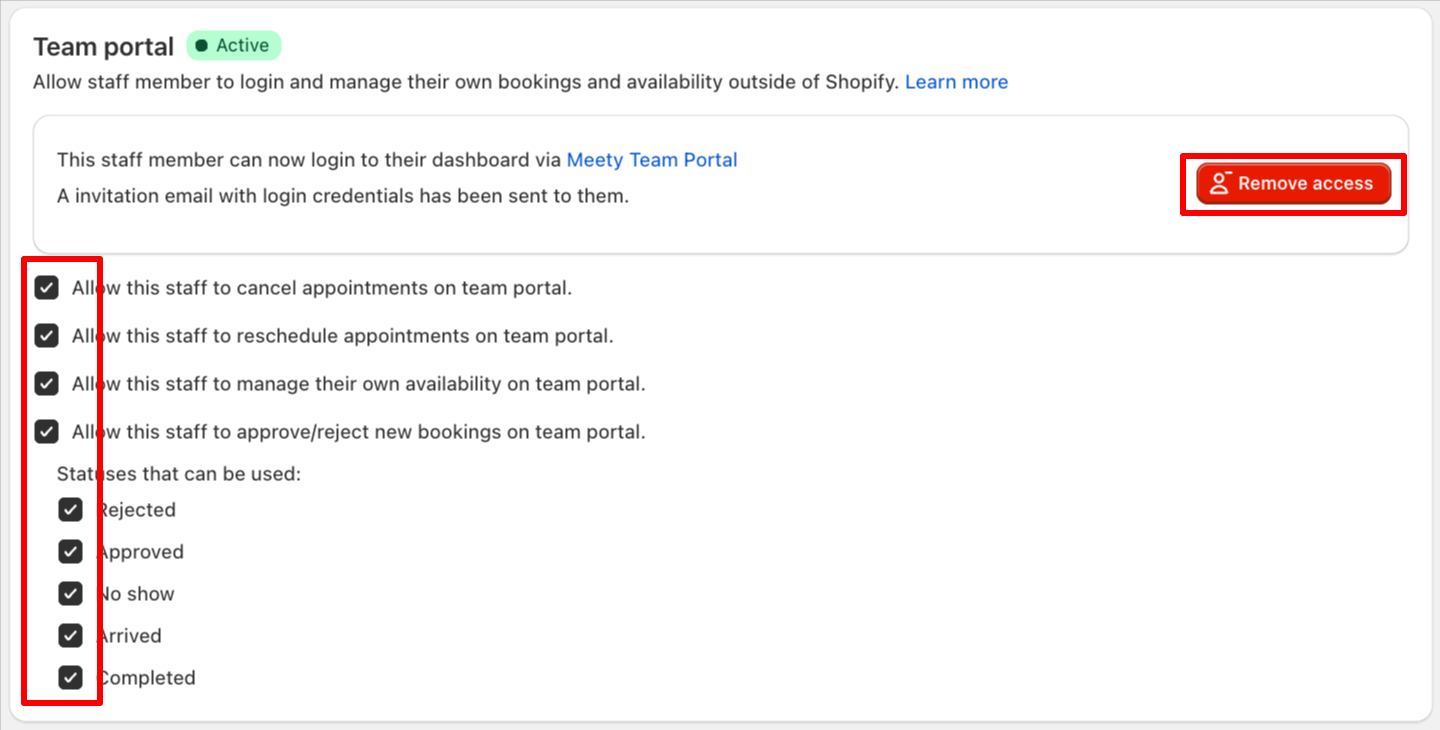
Meety’s Team portal feature allows staff members to log in and manage their schedules, appointments, and availability—without needing access to Shopify. This gives staff more control over their work while reducing administrative workload.
Here’s a closer look at how Team portal works:
a. How to Grant or Remove staff access to Team portal?
Grant staff access to Team portal
To allow staff members to access the Team portal:
Go to the Staff tab
Select the staff member you want to grant access to
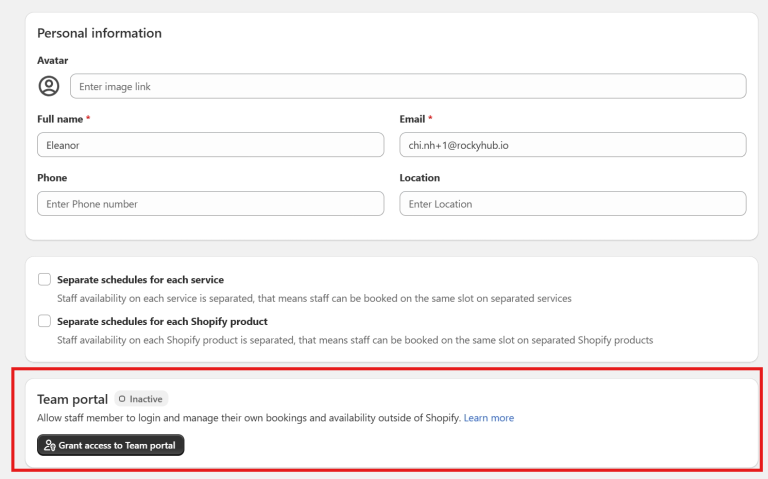
Find the Team portal section > click Grant access to Team portal
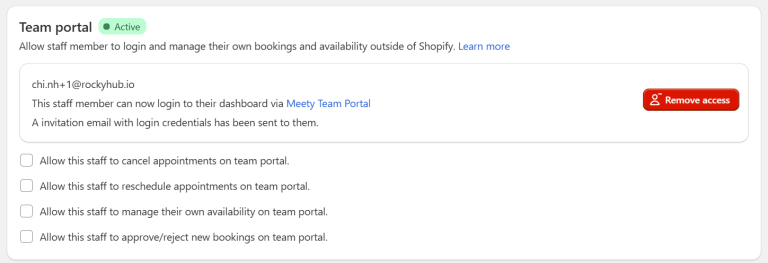
Choose the permissions the staff member can have:
Cancel bookings
Reschedule bookings
Manage availability
Approve/reject new bookings
Click Save to grant access
The staff member will receive an email invitation like this to access Team Portal
Remove staff access to Team portal
You can manage staff access in two ways:
Remove specific permissions:
Go to the Staff tab
Select the staff member you want to update
Uncheck the permissions you want to remove
Click Save to update
Remove full access:
Go to the Staff tab
Select the staff member
Click Remove Access to revoke all permissions
The staff member will no longer be able to log in unless access is re-granted.
b. How can staff log in to the Team portal?
The staff member opens their email invitation and clicks Access Meety Team Portal
On the login screen, click Verify Email
Enter the OTP code sent via email to complete the login process
c. Managing schedules & bookings in Team portal
Adjusting work schedule
Staff can update their working hours
Use Date overrides to set up time off or modify availability for specific days
Managing appointments
Add manual bookings directly from the portal
Edit booking details, including:
Booking status: Pending, Rejected, Approved, No Show, Arrived, Completed
Notes for customers (visible in their booking details)
Customer details for easy reference
Canceling or Rescheduling appointments
Staff members can cancel or reschedule bookings directly from the Team portal
4. How to Configure Staff Availability and Schedule
The Staff Schedule section allows you to assign a staff member to services, configure their weekly working hours, block specific schedules, set schedule overrides, and add buffer time between appointments.
a. Assign Staff to Services
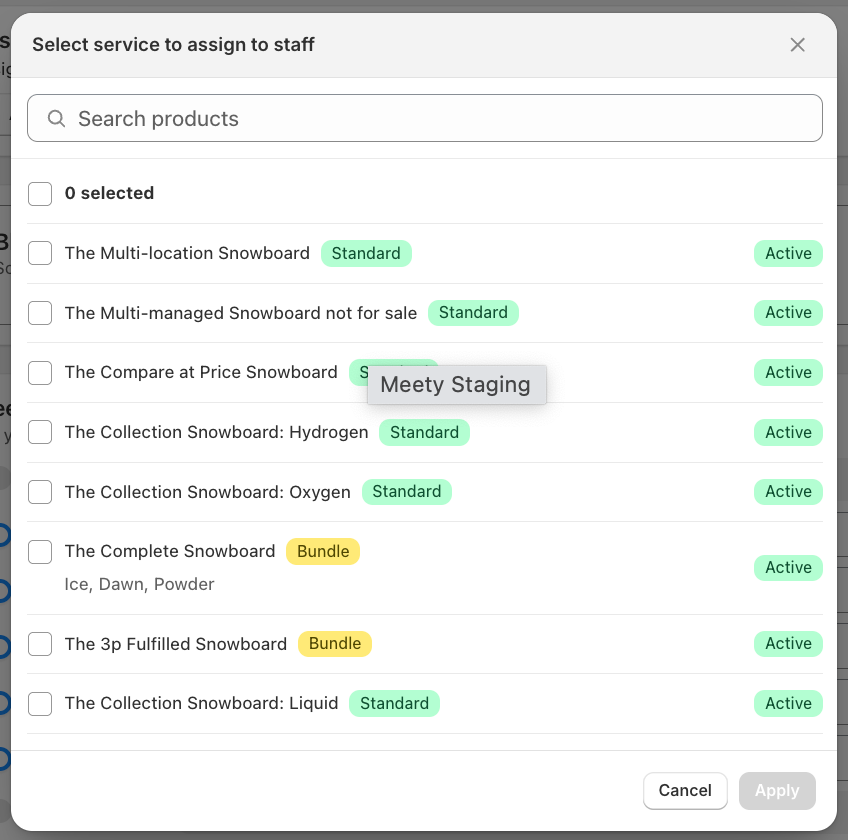
The Assign to service section allows you to specify which services the staff member is available for.
To assign a staff member:
Click Add services.
Select the services you want to assign to the staff member.
Save your changes.
Once assigned, the staff member will be available for bookings for those services according to their configured schedule.
b. Manage Blocked Schedules
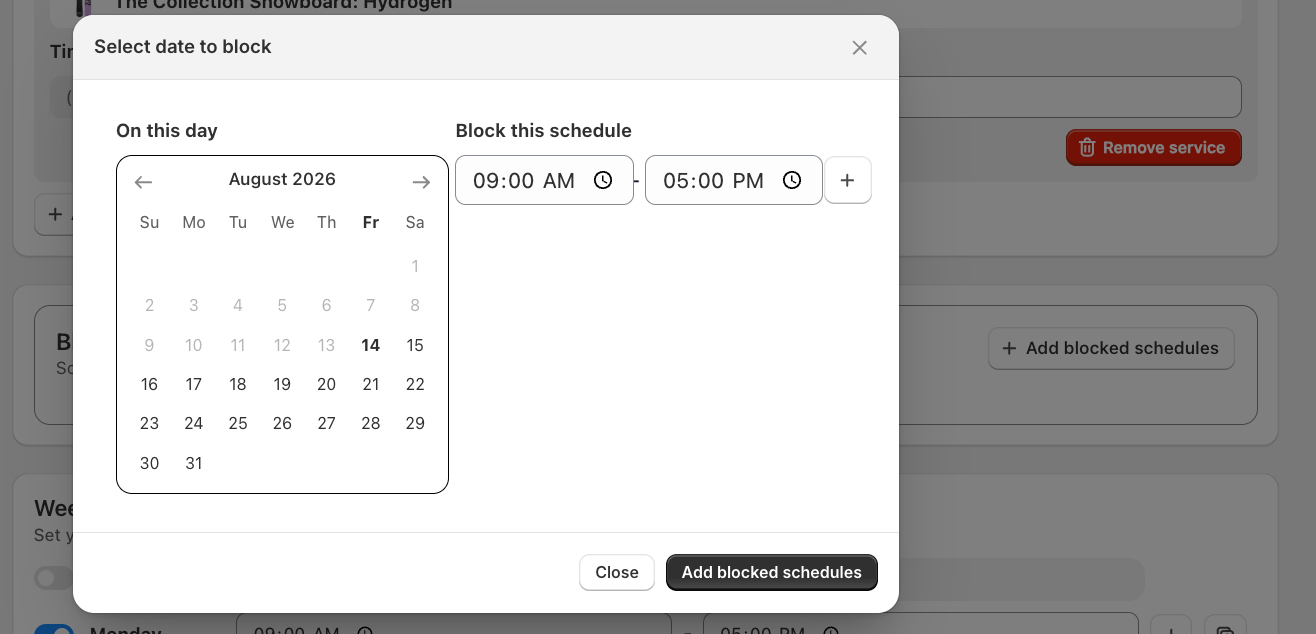
The Blocked schedules section allows you to prevent a staff member from being booked during specific periods.
To add a blocked schedule:
Go to Blocked Schedules.
Click Add blocked schedules to open Select date to block pop-up.
Select the date and time period that should be unavailable.
Click Add blocked schedules to save
Blocked periods will be excluded from the staff member’s availability.
Example: If a staff member is unavailable from 1:00 PM to 2:00 PM for a personal appointment, you can add this period as a blocked schedule.
c. Set the Weekly Schedule
The Weekly schedule section allows you to define the staff member’s regular working hours and break periods for each day.
Enable or Disable a Day
Use the toggle next to each day to indicate whether the staff member is available on that day.
Enabled: The staff member is available according to the configured working hours.
Disabled: The staff member is unavailable for the entire day.
Set Working Hours
For each available day:
Enter the start time.
Enter the end time.
Click the + button if you need to add another working period on the same day.
Example: You can configure Monday as 9:00 AM – 12:00 PM and 1:00 PM – 5:00 PM to create a break from 12:00 PM to 1:00 PM.
Copy a Schedule
Use the copy icon next to a day’s schedule to quickly apply the same schedule to other days, instead of entering the working hours manually for each day.
Set your overrides
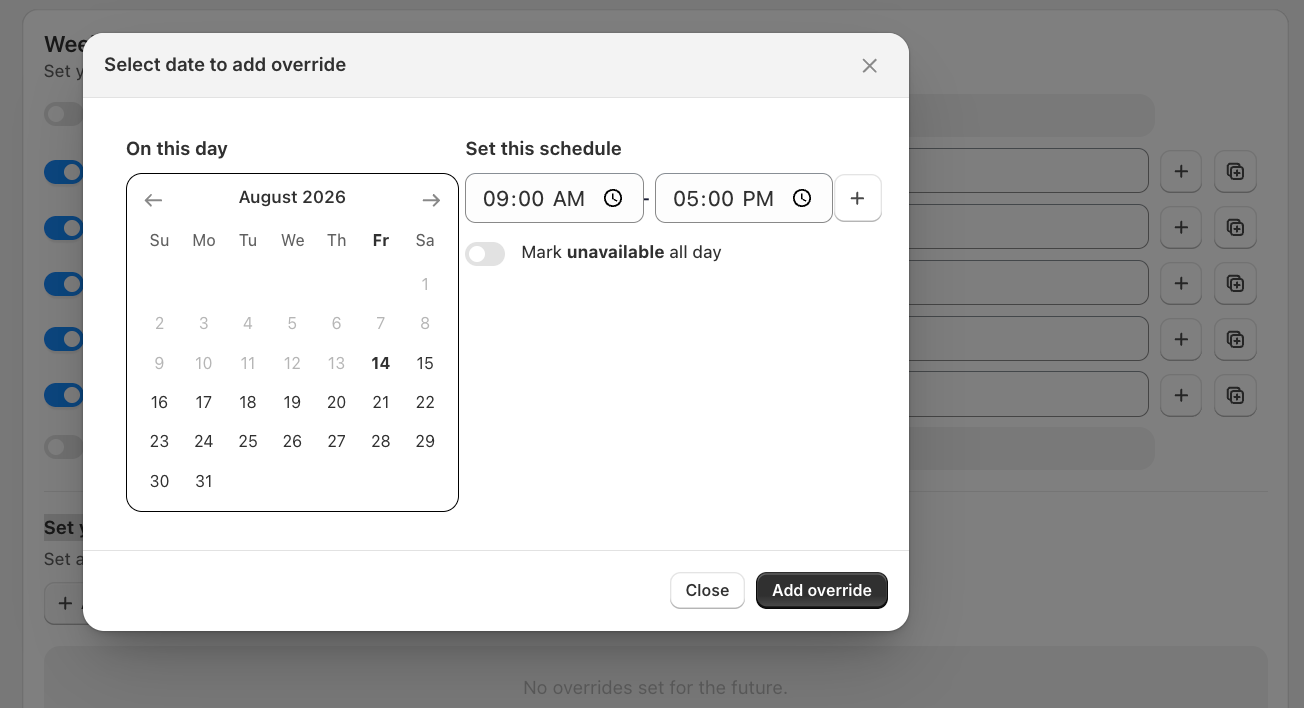
The Set your overrides section allows you to create a temporary schedule for a specific date.
This is useful when a staff member has:
A day off
Shortened working hours
Additional working hours
A different schedule on a specific date
To add an override:
Click Add override button to open pop-up.
Select the specific date.
Configure the staff member’s availability for that date.
Mark unavailable all day if need to set up a day off.
Save the override.
The override will apply to the selected date instead of the regular weekly schedule.
Add Staff Buffer Time
The Staff buffer time setting allows you to add additional time between appointments for a staff member.
This time can be used for:
Preparing for the next appointment
Cleaning up after an appointment
Traveling between appointments
Other necessary transition time
To configure buffer time:
Enter the required amount of time in the Staff buffer time field.
Select the unit, such as Minutes or Hours.
Save your changes.
Example: If you set the staff buffer time to 15 minutes, the staff member will not be assigned another booking during the 15-minute interval required between appointments.